Reproducing the SQL LAG function in Power Query in order to determine an internal promotion
People that start using Power Query after getting experience in SQL tend to miss the wide range of options that SQL gives. Power Query actually has lots of powerful options available and most of the use cases can be solved by only using the UI.
In this blog I will explain how to recreate the SQL lag function in power query by using only the UI. In order to understand this, we first have to get familiar with the SQL lag function as well as Common Table Expressions (CTE).
The SQL way
Let’s say that we have an employee details table called employee_data, which has the following columns:
Employee_number
Change_event
Cost_center
Payscale
Start_date
End_date
Let’s create this table in SQL:
CREATE TABLE employee_data (
employee_number serial,
change_event VARCHAR ( 30) NOT NULL,
cost_center varchar (4) NOT NULL,
payscale VARCHAR (1) NOT NULL,
start_date DATE NOT NULL,
end_date DATE NOT NULL
)
After inserting some dummy data, the contents of the table look like this:

This is data from an event-based ERP. Based on the events, new records are created with new start and end dates. In order to determine if someone has been promoted, we have to compare the current row against the previous row. To make it simple; if the previous row’s payscale was A and the current row’s payscale is B, the employee had a payscale increase (B is an higher payscale than A).
In the current dataset, there is one internal promotion happening for employee 1 as he goes from A to B on 01-06-2020:

To get the previous row, we will need the SQL lag function. However, as the SQL lag function requires it to be included in a window function we need additional logic. (the SQL Window function and all its details will be discussed in detail in a future blogpost). The following code will retrieve the previous row for the payscale column:
LAG(payscale,1)
OVER ()
FROM EMPLOYEE_DATA
The challenge is that it will always retrieve the previous row. In our use case we only need the previous row for the same employee. If we always get the previous row, we will end up mixing data from multiple employees:
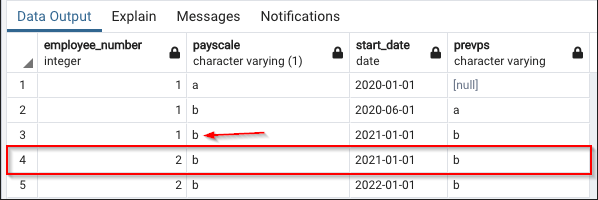
In screenshot above, you can see that the prevps column is displaying the value ‘b’ for employee 2, and the ‘b’ value is actually the value that belongs to employee 1.
In order to get the previous row per employee we will need to use the PARTITION BY part:
SELECT employee_number,
payscale,
start_date,
LAG(payscale,1)
OVER (PARTITION BY employee_number ORDER BY start_date) as prevps
FROM EMPLOYEE_DATA
ORDER by employee_number, start_date
This will result in the following output in which there will be a ‘null’ value for the cases that there is no previous row for the concerned employee:

We can now compare the previous row’s payscale against the current row’s payscale in order to determine if there was a promotion. However, SQL does not allow the newly created column (prevps), to be used in the same SELECT statement. In order to tackle this, we will use the above SELECT statement in a Common Table Expression (CTE):
WITH promotion_table AS
(SELECT employee_number,
payscale,
start_date,
LAG(payscale,1)
OVER (PARTITION BY employee_number ORDER BY start_date) as prevps
FROM EMPLOYEE_DATA
ORDER by employee_number, start_date)

SELECT * FROM promotion_table
WHERE payscale > prevps
What this does is:
- It first creates a temporary table via the CTE
- We can then query this temporary table by our 2nd select statement
- In the 2nd select statement we indicate we only want to see the records where the current payscale is higher than the previous payscale (prevps). Fun fact: you can actually compare textual values in a logical way in SQL, e.g.: B > A = TRUE
The Power Query way
We have exactly the same data in our Power Query dataset, and all data types are correctly indicated:

Power Query does not offer standard functionality to retrieve the previous row. We can however still accomplish this by applying a self-join. Before applying this logic, it is important to first sort the rows correctly. We want to sort the rows ascending based on employee_number and start_date:
Table.Sort(#"Changed Type",{{"employee_number", Order.Ascending}, {"start_date", Order.Ascending}})After sorting the rows correctly, we can proceed with adding 2 separate index columns via add column ribbon -> Index Column:
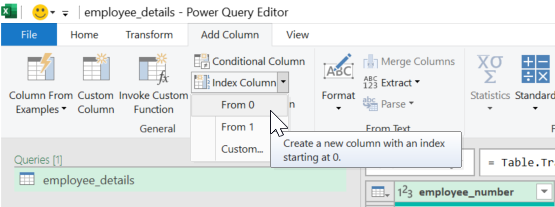
An index column is nothing more than a column that increments by a certain value. We need one index column to start counting from 0 and another starting from 1. After applying this, our 2 new columns should be visible:
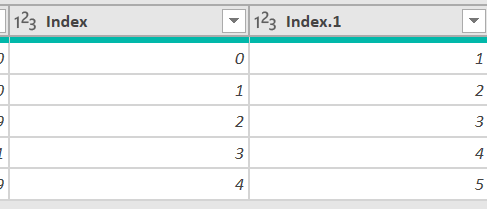
Now we have added the two index columns, we can proceed with applying the self join. In the Home ribbon we click on Merge Queries. In the window that pops up we select our employee_details table:
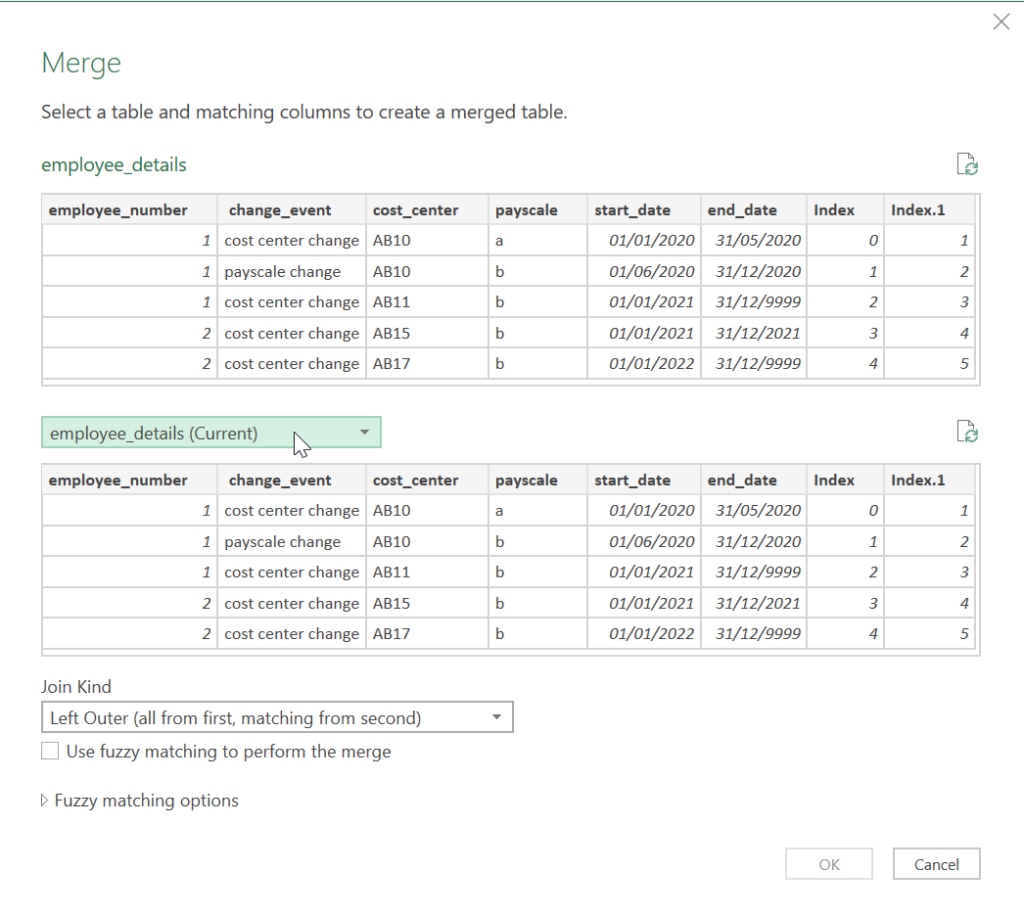
This is the basis for our self-join. The next step is to determine the elements of our self join. For this we select the employee_number column and the two separate index columns:
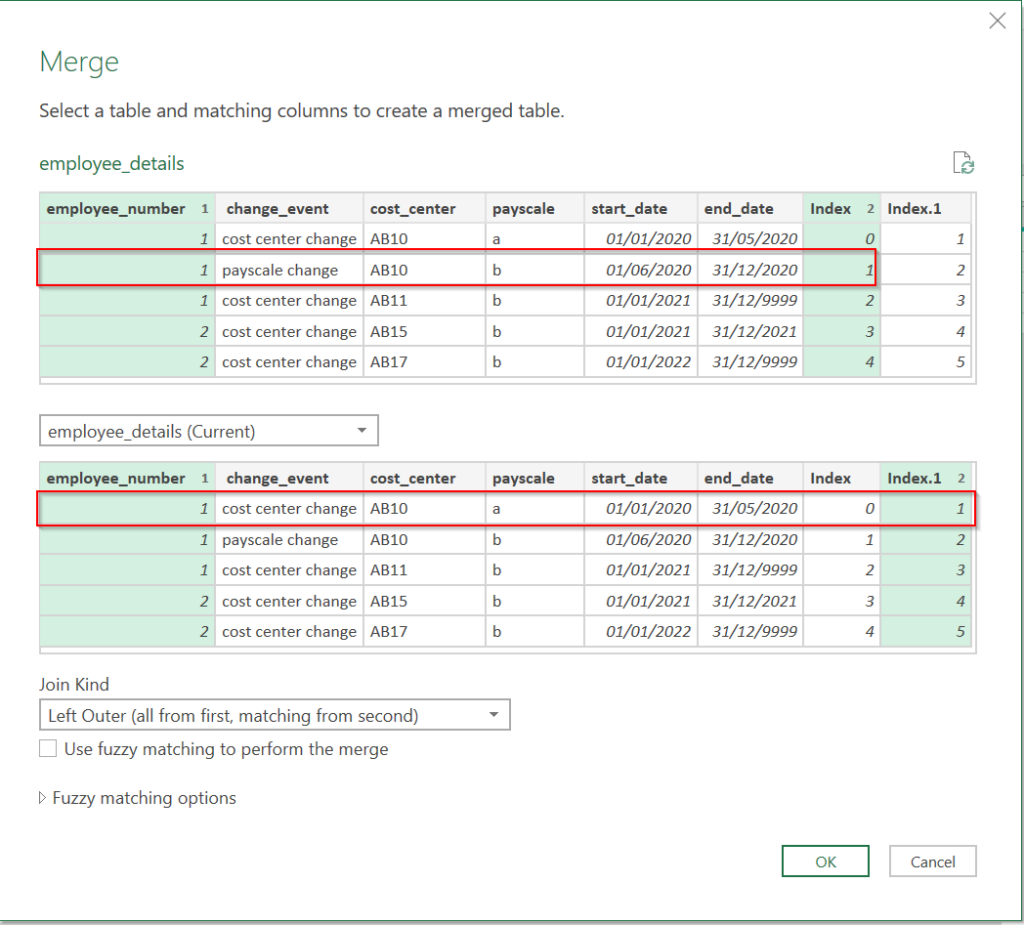
So now we have joined our table on itself, but based on different elements. For each employee number, we want to retrieve the previous row. In the example above, the elements of the main query are employee 1 and index 1. The join is going to search for those elements in the second query (which is still our main table), and it’s going to search for the combination of employee 1 and index 1. Since we have selected the different index column in our joined query, it is going to find this combination in the previous row (see the second red outlined element in example above).
After applying the self-join, Power Query will create this nested table in which the tables are stored that contain the previous row values:
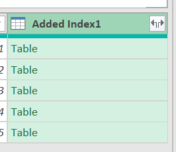
We can expand this nested table, and select the desired columns. We are only interested in the payscale column as we want to compare the current payscale against the previous payscale. Let’s expand this column:
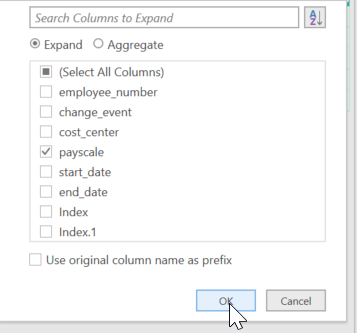
Power Query will give the new column that is added, the ‘.1’ trailing text via this automatically generated code:
= Table.ExpandTableColumn(#"Merged Queries", "Added Index1", {"payscale"}, {"payscale.1"})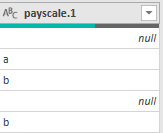
We can change this new column name without creating a new step by changing the created step to:
= Table.ExpandTableColumn(#"Merged Queries", "Added Index1", {"payscale"}, {"prevps"})This results in the following dataset:

Based on this data we can determine the internal promotions by comparing the current row’s payscale against the previous row’s payscale. Let’s create the required logic in a custom column. In the Add Column ribbon, click on Custom Column. In the window that pops up, we give our new column a new name and add the following logic:
if [prevps] = null then "no promotion" else if [payscale] > [prevps] then "promotion" else "no promotion"This will result in the following final column in which the promotion is indicated:

The fact that we can accomplish the required output using solely the UI in Power Query is a powerful thing. We do need to take into account the impact joins have on the performance of the query, which will be covered in a future blogpost.
Leave a Reply